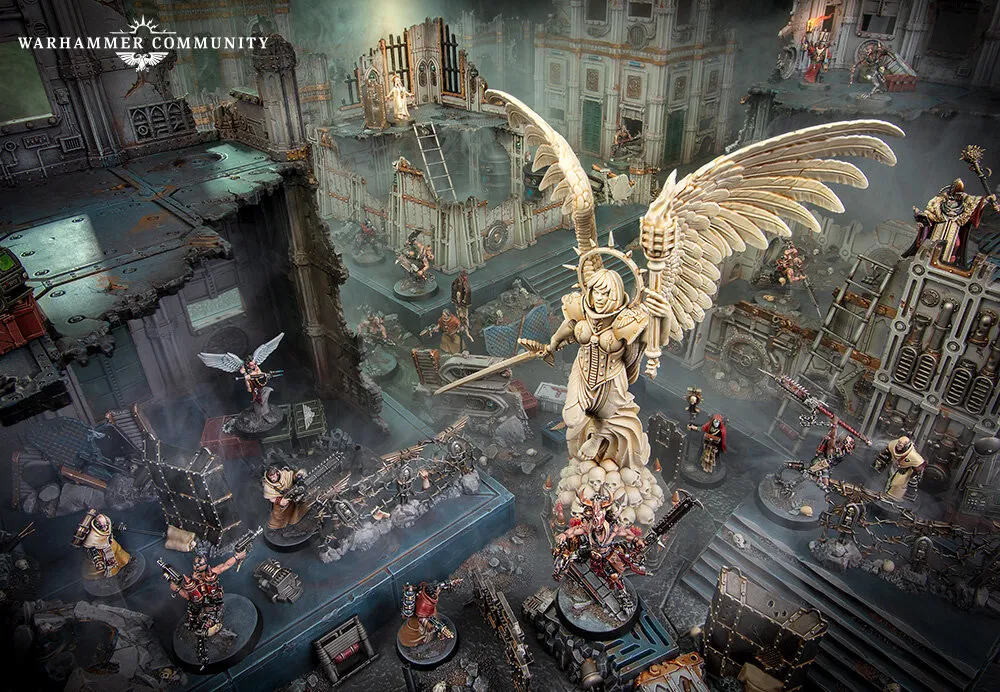
Kill Team: Blood and Zeal is one of the more narratively wild Kill Team boxes GW has put out. The setup: inside a hive city, a massive artillery piece called the Great Gun is being loaded for its next shot. Khorne worshippers (the Goremongers) are trying to detonate the ammunition inside the hive. Ecclesiarchal missionaries (the Sanctifiers) are trying to stop them. It’s a bomb-defusal scenario with chainswords and flamers, which is about as 40K as it gets.
The setting is Volkus, a war-torn hive world that’s been the backdrop for several Kill Team releases now. What I appreciate about GW’s approach here is that Volkus feels like a real place with layers. The Great Gun is a macro-cannon so enormous that it takes entire hab-blocks worth of infrastructure just to service it. The shells are the size of buildings. The loading mechanisms run through the guts of the hive like arteries. When the Goremongers say they want to detonate the ammunition, they’re not talking about blowing up a warehouse. They’re talking about turning an entire city sector into a crater. The Sanctifiers aren’t just fighting to stop heretics. They’re fighting to prevent a catastrophe that would kill millions of Imperial citizens who have no idea the battle is even happening above (or below) them.
The Sanctifiers
Eleven zealous warriors led by a Confessor, armed mostly with flamers and righteous fury. They’re lightly armored but their rules let them shrug off wounds through sheer faith (mechanically represented by ignore-wound abilities). The Drill Abbot and Death Cult Assassin are the standout operatives. If you like the idea of missionary-warriors purging heresy with fire, these are your guys.
Let me break down the key operatives. The Confessor is your leader, and he’s built around inspiring the team through proximity and prayer. He’s not the killiest model on the board, but he doesn’t need to be. His job is to keep your other operatives fighting past the point where they should have gone down. The Drill Abbot is your melee anchor, a heavy-hitting close combat specialist who can hold a choke point against multiple attackers. The Death Cult Assassin is the scalpel to the Drill Abbot’s hammer. Fast, fragile, and capable of deleting a priority target in a single activation if you position correctly. The Pyre Zealots with their flamers are your bread and butter, putting out reliable damage at short range that doesn’t require line-of-sight precision. And the Cherub Bearer is a support piece that provides action economy advantages that are easy to underestimate until you’ve played against them a few times.
They play as a mobile melee horde. The Confessor buffs the whole team’s movement and durability, letting you rush across the board and get into flamer range fast. The key is pressure. You push the Goremongers into positions where they have to deal with multiple threats at once. Having eleven bodies means you can afford to trade pieces, which is something Khorne players hate hearing. Their elite models want to carve through your team one at a time in glorious single combat. Your job is to deny them that by swarming and overwhelming.
The Goremongers
Eight mortal Khorne devotees who’ve been so warped by their worship that they’ve replaced their own legs with mechanical ones to look more like Bloodletters. That’s commitment. They’re equipped with chain weapons and ritualistic daggers, and they’re dosed with combat stimulants mixed with daemon blood. Just enough clarity to fight tactically. Barely.
The Goremonger roster is smaller but every model hits like a truck. The Gorechosen is your leader, a blood-soaked champion who gets stronger as the battle gets bloodier (literally, his abilities scale with casualties on both sides). The Fleshrender is a berserker who specializes in multi-target melee, perfect for carving through clustered Sanctifiers. The Skullseeker functions as the team’s ranged threat, which is ironic for a Khorne warband, but even the Blood God acknowledges that sometimes you need to soften a target before you chop it. The Blood Acolytes are your line troops, and they’re remarkably durable for mortal humans. That daemon blood cocktail they’re juiced up on isn’t just for flavor.
Their rules cap incoming damage and let them chain melee attacks together. They’re tough to kill and absolutely brutal in close combat. Even when they die, abilities like Destructive Demise make sure they take someone with them. The damage cap mechanic is the thing that catches new players off guard. You can’t just spike a big hit and remove a Goremonger in one shot. You have to commit multiple activations to taking each one down, which means the Khorne player is controlling the tempo of the fight even while losing models. It’s a clever design choice that captures the “Khorne doesn’t care whose blood flows” mentality perfectly.
The Gorechosen deserves a closer look because he’s one of the more interesting leader operatives in the current Kill Team range. His abilities revolve around a blood counter mechanic that tracks total casualties across the battle, friendly and enemy alike. As the body count rises, the Gorechosen gains access to increasingly powerful buffs, better combat stats, additional actions, and eventually an area-of-effect ability that represents him entering a complete frenzy. This means the Gorechosen actually gets stronger as your team loses models, which creates a bizarre and very Khorne incentive structure where losing a Blood Acolyte isn’t purely negative because it feeds your leader’s rage. Smart Goremonger players learn to time their sacrificial trades so that the Gorechosen peaks at exactly the right moment, usually during a critical turning point when the Sanctifiers are overextended.
The Fleshrender is the other standout, a pure melee blender designed to punish anyone who clumps their operatives together. His multi-target melee ability lets him make attacks against multiple adjacent enemies in a single activation, which means a careless Sanctifier player who positions two or three operatives in the same corridor is handing the Fleshrender a gift. Against experienced opponents, the Fleshrender functions more as a threat-in-being, his presence on one flank forces the Sanctifier player to spread out, which weakens their ability to concentrate fire elsewhere. Even when the Fleshrender isn’t actively killing things, he’s warping the board state just by existing.
The Mission Pack and Terrain
The box includes a 32-card mission deck split into Blood and Zeal categories. Blood cards boost aggression (extra damage, additional actions). Zeal cards provide survivability (healing, protection). Drawing from these strategically during the game adds a layer of tactical decision-making that keeps matches interesting.
The strategy around the card deck deserves more attention than it usually gets in reviews. As the Sanctifiers player, you generally want to lean into Zeal cards early to survive the initial Goremonger rush, then shift to Blood cards in the later turning points when you need to finish off wounded enemies and claim objectives. The Goremonger player wants Blood cards from the start because their entire game plan is built around overwhelming aggression. But there’s a real tension in the draw because taking a Blood card when you desperately need healing can cost you the game. I’ve seen matches decided by card draws as much as by tactical play, which some competitive players dislike but I think adds to the narrative chaos of the scenario.
The Imperial Shrine Statue terrain piece is the centerpiece. It’s not just decorative. Operatives can interact with it (Praise, Blaspheme, Hallow, Defile) for tactical bonuses. Building and painting it is a fun hobby project in itself. You can consecrate it for the Emperor or desecrate it for Chaos. Both options look great. The interaction mechanic makes the statue a natural focal point for the battle. Both teams want to control it, which creates a dynamic where the fighting gravitates toward the center of the board rather than devolving into corner camping.
Hobby and Painting
Both teams in this box are a painter’s dream. The Sanctifiers lend themselves to a classic Ecclesiarchy palette: rich golds, ivory whites, deep reds, and parchment tones. The robes are the star of the show for these models. If you’ve been wanting to practice painting cloth and freehand scripture, the Sanctifiers give you plenty of surface area to work with. I’d recommend starting with a Zandri Dust base for the robes, shading with Agrax Earthshade, and layering up to Ushabti Bone. The metallics on their equipment look best in warm golds rather than silver, which keeps the whole team feeling like a religious procession rather than a military unit.
The Goremongers are a different challenge entirely. The mechanical legs need to look functional but corrupted. Leadbelcher with a heavy Nuln Oil wash gives you a good industrial base, and then you can add Typhus Corrosion and Blood for the Blood God technical paint to sell the “daemon-infused prosthetics” look. The skin tones should be sickly and flushed, showing the effects of the daemon blood stimulants. Don’t be afraid to go heavy on the gore effects with these models. They’re Khorne worshippers who voluntarily amputated their own legs. Subtlety is not their brand.
How It Stacks Up
Compared to other Kill Team boxes in the current range, Blood and Zeal sits comfortably in the upper tier. It’s not quite at the level of Nightmare (which had the Mandrakes and Inquisitorial Agents, both excellent standalone teams), but it’s well above average. The asymmetry between the two teams is what makes it work. Eleven fragile zealots versus eight durable berserkers is a matchup that plays differently every time, and the mission pack keeps it fresh even after a dozen games.
In terms of raw value, Blood and Zeal is competitive with the best Kill Team boxes GW has released. You’re getting nineteen models across two teams, a terrain centerpiece, the card deck, and a full mission pack. Compare that to something like Hivestorm, which gave you two teams and terrain but lacked the card mechanic that adds so much replay value here. Or compare it to older boxes like Into the Dark, which had better terrain but less interesting team asymmetry. The Sanctifiers and Goremongers both work as standalone teams you can bring to any Kill Team game, not just the missions in this box, which means the purchase keeps paying off long after you’ve exhausted the included scenarios. If you’re buying a Kill Team box primarily for the teams and you want both to be viable in competitive play, Blood and Zeal is one of the better options in the current rotation.
If you’re new to Kill Team, this is a solid entry point because both teams are straightforward to learn. The Sanctifiers teach you about action economy and positioning. The Goremongers teach you about trading efficiently and pressing advantages. And if you’re a veteran player, the card deck system adds enough complexity to keep things interesting.
Worth It?
If you’re a Kill Team player looking for strongly themed teams with distinctive mechanics, Blood and Zeal delivers. The Sanctifiers and Goremongers play completely differently from each other, and the mission pack adds replay value. For a closer look at the physical contents, check out our unboxing.
The models are excellent on both sides. I keep coming back to the Goremonger legs. The design team at GW made the bold choice to have mortal Khorne worshippers hack off their own limbs and replace them with digitigrade mechanical stalks, and the sculptors absolutely nailed the unsettling blend of human torso and inhuman lower body. The Sanctifiers have their own visual appeal in the opposite direction: ornate, righteous, covered in scrollwork and Imperial iconography. Put both teams on a board with the shrine terrain and you’ve got one of the most visually striking Kill Team setups you can assemble.